Menu
-
MenuBack
-
Online Store
-
-
-
-
-
Leer
- Couverture
- Temperature control units
- Aids for chocolate
- Chocolate molds
- Praline fillings
- Chocolate ingredients
- Praline hollow body
- Chocolate colors
- Chocolate tattoos
- Chocolate packaging
- Bean to Bar
- Material for cutting chocolates
- Batons with Kirsch
- Airbrush for chocolate
- High Heels Accessories
- Textured films for chocolate
- Chocolate fountain & fondue
-
-
-
-
-
Kuchen & Torten
- Cakes Fillings & Ingredients
- Fondant & Marzipan
- Cakes tools
- Cake rings
- Silicone molds
- Baking pans for cakes
- Cake stand
- Cakes packaging
- Airbrush for cakes
- Sugar flowers accessories
- Cake Topper & Wedding Figurines
- Cakes dummies
-
-
-
-
-
-
-
-
-
-
-
-
-
-
-
-
-
-
-
-
-
-
-
Füllungen
- Baking chocolate
- Glucose & Sorbitol
- Cocoa beans
- Cocoa nibs
- Monin syrup
- Champagne & Alcohols
- Freeze dried fruits
- Cake & cake glaze
- Flours & baking ingredients
- Chocolate coating & chocolate
- Milk powder
- Granules
- Nuts & Nougat
- Fruit puree
- Creams & Fillings
- Egg yolk & egg white
- Fruit powder
- Special ingredients
- Fondant & Flower Paste
-
-
-
-
-
-
-
- Punching, cutting & embossing
- Mixing bowls & whisks
- Chocolate material
- Thermometer & Burner
- Gloves & Protective Material
- Smoothing & Modeling
- Roll out bar
- Dough scraper & horn
- (Flour) sieves
- Cake turntable
- Spatula & Spatula
- Silicone embossing molds
- Insert strips & cake slices
- Brushes & Tweezers
- Measuring cup
-
-
-
-
-
-
-
-
-
Ausstechformen
-
-
-
-
-
-
-
-
-
Courses
-
-
kurse
- Current courses
- Praline courses
- Chocolate courses
- Chocolate kiss course
- Macaron courses
- Cake courses
- Baking courses
- Patisserie courses
- Ice cream course
- Guetzli, Cookie & Confectionery Courses
- Bread courses
- Pasta courses
- Apéro course
- Cupcakes courses
- Éclair course
- Courses in Zurich - Adliswil
- Children's courses
-
-
- Team Events
- Hen Night
- Retail Store
-
About Us
-
-
-
DirectionsDownload relevant PDF now.
-
-
-
Recipes blog
-
-
Recipes Blog
-
-
-
Shipping and Payment
-
-
Versand/Zahlung/Impressum
-
-
shopping_cart
Basket
(0)
- Online Shop
-
- Novelties
- Sale
- Chocolate and chocolates
- Couverture
- Temperature control units
- Aids for chocolate
- Chocolate molds
- Praline fillings
- Chocolate ingredients
- Praline hollow body
- Chocolate colors
- Chocolate tattoos
- Chocolate packaging
- Bean to Bar
- Material for cutting chocolates
- Batons with Kirsch
- Airbrush for chocolate
- High Heels Accessories
- Textured films for chocolate
- Chocolate fountain & fondue
- Couverture
- Gifts Cards
- Stencils & Stencils
- Cakes & Pies
- Ice cream
- Bread
- Macarons
- Hearty
- Recipe booklets & books
- Cupcakes
- Dessert
- Cake Pops
- Edible decorations
- Fillings & Ingredients
- Glucose & Sorbitol
- Cocoa beans
- Baking chocolate
- Cocoa nibs
- Monin syrup
- Champagne & Alcohols
- Freeze dried fruits
- Cake & cake glaze
- Milk powder
- Flours & baking ingredients
- Chocolate coating & chocolate
- Granules
- Nuts & Nougat
- Fruit puree
- Creams & Fillings
- Egg yolk & egg white
- Fruit powder
- Special ingredients
- Fondant & Flower Paste
- Food Colors
- Auxiliary means
- Spouts & piping bags
- Fondant, marzipan, flower paste
- Bakeware
- Aprons & Potholders
- Cookie cutters
- Season
- Candles
- Party accessories
- Tableware
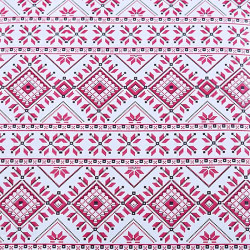
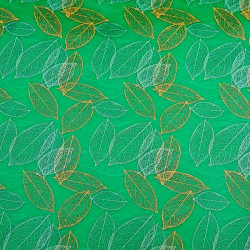
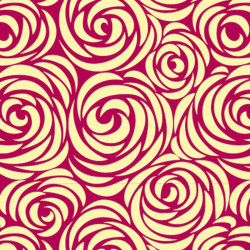
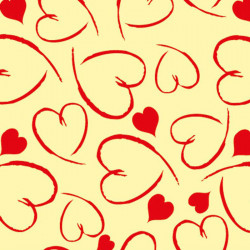
Chocolate tattoo
There are 20 products.
Showing 1-20 of 20 item(s)
Active filters


- Out-of-Stock
- Out-of-Stock
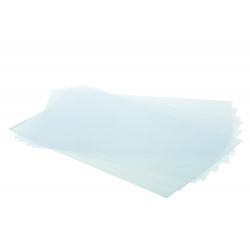
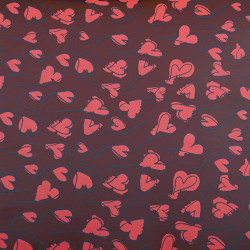
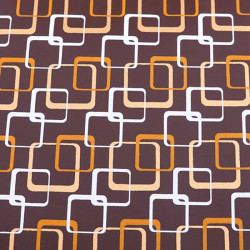
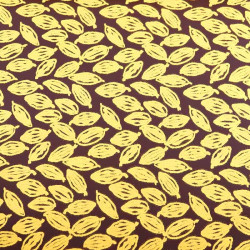
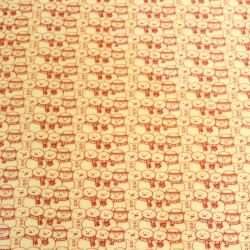
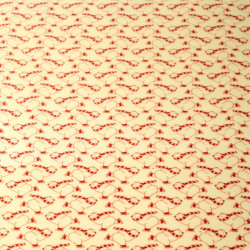
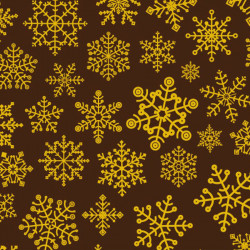
What are Schoggi Tattoos?
Chocolate tattoos or decals for chocolate are special labels or tattoos that can be applied to chocolate. These tattoos or decals can be made from edible ink or coloring processes and are designed to be easily transferred onto chocolate. They often serve as a decorative element on chocolate products such as chocolates or chocolate bars. Applying chocolate tattoos or peel-off foils to chocolate makes it possible to create personalized or themed designs, thus increasing the visual appeal of chocolate products.
For the production of chocolate tattoos one uses a plastic, on which with colored cocoa butter color different motives are printed. If you want to cover a chocolate with chocolate, you can cut the plastic to a suitable size and place it with the rough side, where the cocoa butter color is, on the still liquid chocolate. Press it down carefully and put it in the fridge for at least 10 minutes. A little later, the praline can be taken out of the refrigerator and the foil can be removed. The plastic is now gone and what remains is the pattern of the colored cocoa butter color.
This film is suitable for many different chocolate products such as: Chocolates, chocolate bars, hollow figures and other chocolate specialties. You can buy this Speziele Schoggi Tattoo only in a few bakery stores or online stores. One of the biggest chocolate stores in Switzerland is at miniSchoggi. There you will find a large selection of different peel-off foils for chocolates or tattoos for chocolate. Browse now in the online store of miniSchoggi and find your suitable chocolate tattoo.