- New
- Out-of-Stock


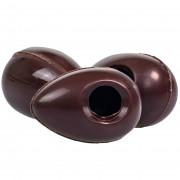
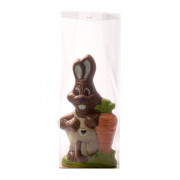
What's that hopping? Chocolate figures make perfect gifts. At Easter, chocolate Easter bunnies line the shelves of every store and in the run-up to Christmas, hundreds of chocolate seed bunnies are sold. Chocolate figures are a great gift for friends, relatives and acquaintances and can also be poured with the children. Especially at Easter, it's a great treat to watch the children searching for Easter. This Easter figure is sure to make big eyes for young and old alike! With this high-quality polycarbonate mold with integrated magnets, you can easily cast 2 bunnies at the same time.
Data sheet
What's that hopping? Chocolate figures make perfect gifts. At Easter, chocolate Easter bunnies line the shelves of every store and in the run-up to Christmas, hundreds of chocolate seed bunnies are sold. Chocolate figures are a great gift for friends, relatives and acquaintances and can also be poured with the children. Especially at Easter, it's a great treat to watch the children searching for Easter. This Easter figure is sure to make big eyes for young and old alike! With this high-quality polycarbonate mold with integrated magnets, you can easily cast 2 bunnies at the same time.
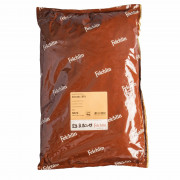
Before you can use the mold, you need to prepare a very important component: the delicious chocolate coating. It is not enough to simply melt the drops. The chocolate coating must be tempered before use. Only use high-quality couverture and not the chocolate from the supermarket. Each couverture goes through three stages during tempering. Melting, cooling and heating again. After the last stage, the couverture is at the optimum processing temperature. The temperatures vary depending on the couverture. If you are looking for the Table in our blog post, then nothing can really go wrong. To make sure that your couverture is really at the right temperature, you can also use a Chocolate thermometer for help.
Preparation is extremely important for all molds used for casting chocolate molds. Rinse the mold with lukewarm water and a gentle detergent. This must not contain any lye or rinse aid, as this would attack the molds. Then wash off all residues with lukewarm water and dry the mold thoroughly. Polish the mold with non-fraying absorbent cotton or a very fine handkerchief. From now on, you should no longer touch the mold directly, otherwise you will see fingerprints on the chocolate later. Hold the mold by the edge where no chocolate will be poured later. Make sure that your mold has reached room temperature, as a mold that is too hot or too cold can interrupt the tempering process.
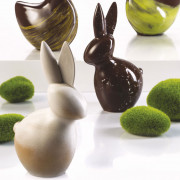
Painting the mould means decorating the chocolate mould with different types of chocolate (white, dark or milk chocolate) in different colors. If you would like to find out exactly how to mold a chocolate figure, you can find out in this Video more about this. For a chocolate figure, we recommend that you always start with the eyes, or rather the pupils. These are usually filled with dark tempered couverture using a Cornet drawn into the mold. A cornet is a special paper made of glassine, which is rolled into a cornet and filled with liquid tempered couverture. This is like the colored pencil you need for drawing, simply with chocolate. Larger areas can easily be decorated using a brush. Once you have made the pupils with dark couverture, you can think about what else should be decorated with dark chocolate. For a Santa Claus figure it might be the shoe, for an Easter bunny perhaps the Easter basket.
If no dark chocolate coating is required, you can now use the next chocolate color. We recommend always using white tempered chocolate coating as the second color, so that you can now finish painting the eye, for example. And so it goes on until you have finished making up / decorating your chocolate figure.
To give the chocolate figure a special look, you can color the white tempered couverture with fat-soluble powder paint and thus obtain any color, whether red, blue or green. With these colors, for example, a Santa Claus gets his red hat or the Easter bunny gets an orange carrot. It is important that all materials are clean, dry and free of grease. Once the couverture has dried, the next layer is applied. Work your way further and further inwards. During the make-up process, you can occasionally turn your shape over. This way you can see what your end product will look like. Make sure that each layer dries well.
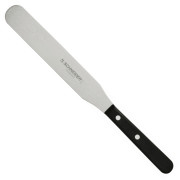
Once you are happy with all the colored details, let the whole thing set again briefly. Then take a larger brush. Use this to brush the entire shape with the couverture. Use the type of couverture that you want your product to have. For example, if you want to make a bunny, use white couverture for the eyes or ears and dark couverture for the pupils. The type of couverture to be used is the couverture that your bunny will later take on. In this case, it could be a milk couverture. After brushing the surface with the milk couverture, no more air bubbles should be visible. These would otherwise be visible as holes in the finished shape. Use a metal horn to remove any chocolate from the surface of the mold halves. Then place the mold halves on top of each other. The magnets will hold your mold together very well. Now you can fill the mold completely with couverture. It is best to use a soup ladle for this. Use the chocolate hammer or the handle of a spatula to tap against the edge of the mold so that any air bubbles rise.
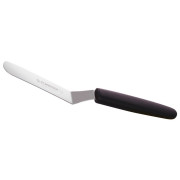
Quickly turn the mold over and let the couverture flow back into the container, continue to tap the edge with the chocolate hammer and wait until the excess couverture has run out. If you now notice that the resulting wall is a little too thin, simply repeat the filling and emptying process. Then scrape off the bottom drops with the metal horn or a spatula and place the mold in the refrigerator for 5 - 10 minutes.
In the meantime, you can prepare the base of the tin. Spread a little couverture on a clean sheet of baking paper using a spatula. Now press the cooled mold well into it. Place the mold and the baking paper together in the fridge for another 5 - 10 minutes. Then take the mold out of the fridge and remove the clips. Place the figure in the fridge one last time. By removing the clips, the chocolate has room to separate from the mold. In total, your mold should be in the fridge for about 30 minutes or until the figure has separated from the mold. Now break off the excess base by moving it back and forth and shape the figure. To do this, carefully insert a spatula into the gap between the mold halves and move the spatula slightly. Be careful, the molds release quickly and the figure should not fall off straight away or be damaged by the spatula. The chocolate figure can now be elegantly wrapped.
Polycarbonate is not a simple plastic or hard plastic. Unlike most plastics, it can withstand very high temperatures. Polycarbonate is very transparent, very strong and incredibly robust. It is considered almost unbreakable and scratch-resistant and is therefore often used instead of glass. The thermoplastic polymer is therefore used in the manufacture of spectacle lenses, car headlights and in the construction industry. As it is also lighter than glass, it is a welcome alternative. These properties do not necessarily make the material cheap and polycarbonate is therefore only used when it is really necessary. For the confectionery sector, it means that perfect pralines, chocolate bars or other chocolate products can be produced in the mold. Unlike silicone, polycarbonate gives the chocolate its shine after polishing. Thanks to the dimensionally stable chocolate mold, the chocolate can contract during cooling and thus be easily removed from the mold. Silicone, on the other hand, is known for its tendency to conform to the mass. This is not desirable in the confectionery industry. We therefore recommend that you avoid silicone molds for chocolate products and opt for high-quality polycarbonate.
Immerse yourself in the World of chocolate. Whether it's pralines, chocolate bars, chocolate bars or other chocolate products, we want to introduce you to the pleasure of chocolate making. Whether it's a tempering, molding or praline course, at miniSchoggi we are sure to meet your taste. As a great experience for the whole family or for making unusual gifts, our figure casting courses are perfect. At miniSchoggi, you will learn how to properly polish polycarbonate molds, make them up sweetly and pour them out nice and thin. This is how young and old create colorful and elegant chocolate figures. Children as young as 8 can take part and make a very special Easter bunny or Santa Claus. An experience for young and old.

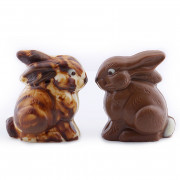
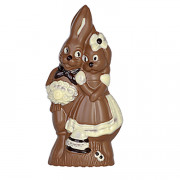


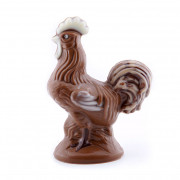

What's that hopping? Chocolate figures make perfect gifts. At Easter, chocolate Easter bunnies line the shelves of every store and in the run-up to Christmas, hundreds of chocolate seed bunnies are sold. Chocolate figures are a great gift for friends, relatives and acquaintances and can also be poured with the children. Especially at Easter, it's a great treat to watch the children searching for Easter. This Easter figure is sure to make big eyes for young and old alike! With this high-quality polycarbonate mold with integrated magnets, you can easily cast 2 bunnies at the same time.