Blog Navigation

The best aniseed biscuit recipe

8 Liked
1 Comment
(5)
 

Homemade aniseed biscuits

Aniseed biscuits come in many different shapes. We thought we would emboss them in our beautiful aniseed shapes. This way you can make lots of different and lovely aniseed biscuits with very little effort. The good thing about the dough is that it is actually very easy to make. The only thing that might prevent you from making these delicious Christmas biscuits would be the long time they take. But hey, that's not time you have to invest yourself. Not at all. The dough simply has to rest for a while at room temperature. Well, it's a whole 24 hours, but you can still do whatever you want during that time. The production is anything but complicated and the stamping of the aniseed rolls is almost meditative and definitely fun. Simply choose your favourite motif from a variety of different shapes. Browse through our online shop, get your artistic embossing moulds home and start baking!

For all those who prefer to have everything in printed form in front of them, there is a simple PDF to print out at home.

Most important key data

Quantity: Approx. 20 pieces

Drying time: 24 hours

Baking time: 10 to 12 minutes

Temperature: 170 ºC convection oven

Level of difficulty: Medium

Ingredients

Granulated sugar100 g
Whole egg | Egg whisked50 g
Aniseed | whole1.5 g
White flour100 g

Production

Beat the sugar together with the eggs in a food processor until foamy white. Depending on the recipe, this will take between 15 and 30 minutes. We therefore recommend that you use a food processor.

Once the mixture has been beaten long enough and is nice and airy, you can turn the machine on low and add about 1/3 of the flour. Sift the flour before adding it so that it is nice and fine.

Once the flour has been stirred in, you can also add the aniseed and stir in on a low speed. Put the rest of the flour on your work surface and form a large hollow with your hands. Pour the foamy egg mixture into this prepared hollow.

Now, using a metal horn or dough scraper, fold the flour over the foam mixture. This will make the mixture thicker and thicker as it absorbs the flour. Continue folding the dough with the metal horn until it becomes firmer.

Knead the dough into a large lump using the metal horn, dust your work surface with flour and place the dough on it. Now cover it with a dough towel and leave it to soak at room temperature for 30 minutes. This will make it less sticky.

After the swelling time, knead the dough again briefly with your hands (it should almost no longer stick) and then roll it out to a thickness of 5 mm on a floured work surface using rolling pins. Then cut out the dough with a round cutter that is about the same size as the embossing mould .

Brush the aniseed mould with a little oil (if you have used too much, you can dab it with some kitchen paper), dust it lightly with flour and then press the cut out dough into the mould. Press lightly and make sure you get every indentation.

Carefully release the dough from the mould (it usually falls out by itself when you tilt the mould) and place the Guetzli on a buttered baking tray with a little space between them. Leave the dough to dry at room temperature for 24 hours. Do not cover!

Finally, bake the dried Chräbeli in a preheated oven at 170 ºC convection oven for 10 to 12 minutes.

Storage & Shelf Life

They will keep for up to 4 weeks in a biscuit tin. Just remember that the older they get, the harder they become.

You can store them in the freezer for 2 months without any problems.


Leave a comment

Security code

Comments

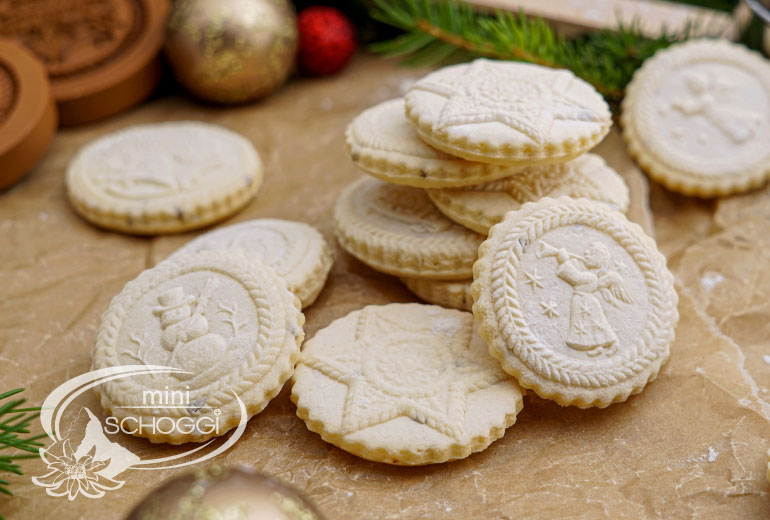
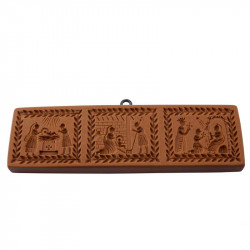
  • Aenisguetzli mit Springerle-Model
    By: Lisbeth Troxler On October 8th 2022
    Rating:
    5.0

    Danke für Ihr Rezept, immer toll was von Ihnen zu lernen.
    Leider sind sie mir nicht sooo gut geraten, hatte Schwierigkeit zum herauslösen und nach dem
    backen war das schöne Motiv weg.

    Replied by: Thomas Ramseier On October 9th 2022 Vielen Dank für den lieben Kommentar. Die Formen unbedingt mit ein wenig Öl einfetten oder etwas Mehl stauben und danach prägen. Haben Sie die Änis-Guetzlis auch 12 bis 24 Stunden trocknen lassen, bevor diese in den Backofen gingen? Weil dies macht auch viel aus. Süsse Grüsse Ihr miniSchoggi-Team