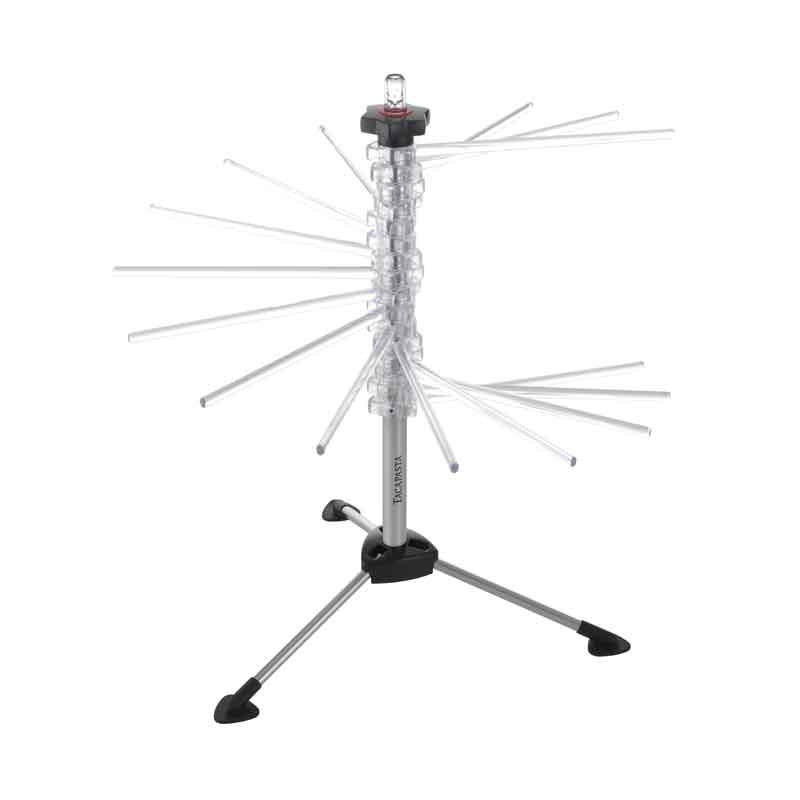


The pasta rack Tacapasta has 16 sturdy and individually movable arms on which up to 2 kg of pasta can be hung and dried. The set also includes a rod with which the pasta freshly caught by the pasta machine can be immediately put on the arms. So you make your homemade pasta long shelf life.
Data sheet
Homemade pasta tastes best, well dried and sealed in a suitable container, they can be stored for up to a month. So they are also perfect as a delicious gift. The arms can be moved individually and can thus be mounted offset, On these arms you can hang and dry up to 2 kg of pasta, with the multi-purpose rod, the pasta can be easily lifted from the pasta machine to the dryer.
250 g white flour
250 g durum wheat semolina
20 g powder at will (tomato, spinach, wild garlic, beet or sepia ink)
5 eggs
Mix the dry ingredients together and form a hollow in the middle. Add the beaten eggs and knead everything into a dough. Finally, the dough should be nice and smooth and not stick to your hands. Add a little flour or water, depending on the consistency, until the dough is comfortable to work with. For a particularly nice dough, don't add salt and don't use eggs straight from the fridge.
Roll the dough out nice and thin with the help of a pasta machine. To do this, first fold the dough a few times and then roll it through the machine at an increasingly higher level. Finally, the individual dough sheets are brought into the right shape with the help of a cutting roller or pasta dough cutters. With the all-purpose stick, you can collect the pasta directly from the machine or lift it up after cutting with a pasta cutter.
Unfold the legs of the pasta dryer and place it in a suitable place. Now the arms can be rotated and adjusted so that the noodles do not have to be placed directly on top of each other. Hang the noodles on the arms with the rod. The multi-purpose rod has a recess with which you can hang on the arms and thus easily wipe off the pasta.
For drying is best suited a dry room, then the noodles need 5 to 6 hours. The dry noodles can then be well packed in a small bag to give away or for example in a jar. If you then want to enjoy them, they can be boiled for four to six minutes until soft. Then serve them with a delicious sauce and some cheese.
The pasta dryer does not get very dirty when used appropriately, so it hardly needs cleaning. From time to time you can wipe the arms with a damp cloth. If the pasta rack is just not used, the arms can be brought to a line and the dryer can be stored space-saving.


The pasta rack Tacapasta has 16 sturdy and individually movable arms on which up to 2 kg of pasta can be hung and dried. The set also includes a rod with which the pasta freshly caught by the pasta machine can be immediately put on the arms. So you make your homemade pasta long shelf life.
