

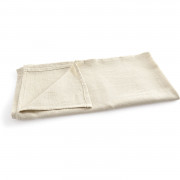
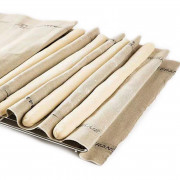
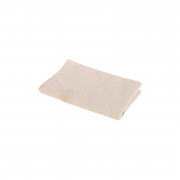
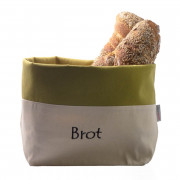
What should no amateur bakery be without? The pastry cloth! Use the dough cloth to cover your rising dough. All you need is a little flour and you can place your bread dough on it or cover it and leave it to rise. The cloth won't stick to the dough and your kitchen will stay clean. Don't hesitate and start baking your own bread.
Data sheet
What should no amateur bakery be without? The pastry cloth! Use the dough cloth to cover your rising dough. All you need is a little flour and you can place your bread dough on it or cover it and leave it to rise. The cloth won't stick to the dough and your kitchen will stay clean. Don't hesitate and start baking your own bread.
The pastry cloth is made of 100% polyester, has a non-stick effect, reduces germs and is dirt and water repellent. You can easily wash the cloth in the washing machine at 40 °C. However, please do not put it in the tumble dryer, preferably leave it to dry in the fresh air.
You can leave your dough pieces to proof on the cloth or cover the bowl or proofing basket with the cloth. The cloth stabilizes the dough during proofing and prevents moisture loss.
It is also very useful for rolling up strudel dough. As you can see, such a cloth is indispensable in the hobby bakery.
Pre-dough:
100 g water
10 g yeast
150 g white flour
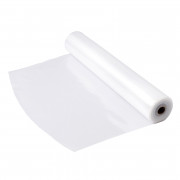
Mix the water, yeast and white flour together in a bowl and leave the mixture, covered with a plastic cloth, to stand at room temperature for an hour.
Main dough:
Ready-made pre-dough
100 g water
10 g yeast
4 g Baking malt
300 g white flour
20 g sunflower oil
10 g salt
Place the pre-dough in a kneading machine with dough hooks.
Mix the water, yeast and baking malt in a liter jug and then add this mixture to the pre-dough in the kneading machine.
Now add the flour and leave the machine on a low setting for 2-3 minutes to mix everything well.
As soon as the dough is a little firmer, you can add the oil in a fine stream and leave the dough to mix for a further 3 minutes on a low setting.
Once everything is well combined, knead the dough again at high speed for approx. 8-10 minutes.
As soon as the dough becomes more elastic, you can add the salt towards the end of the kneading time and mix it in briefly.
Cover the finished dough with a plastic tea towel and leave it to rest at room temperature for 15-20 minutes. You can of course reuse the plastic dough cloths. Simply wipe it briefly with a damp cloth and it is ready for the next use.
Roll out the finished dough to a thickness of 1 cm using rolling pins and take a rolling pin. Star cookie cutter size 7 cm to hand.
Cut out the stars and place them on a baking tray lined with baking paper. Simply knead the remaining dough back together and roll it out again until it is completely used up.
Cover the stars with a tea towel and place them in the fridge for 30 minutes.
Lye & baking:
500 ml water, cold
20 g Lye pearls
Preheat the oven to 210 ºC circulating air and mix the lye.
If you are working with lye, the use of Protective gloves and Safety goggles obligatory. Lye is corrosive and can cause serious injuries. We don't want to scare you, because you definitely shouldn't be afraid, but it is definitely good to have a certain respect for handling lye.
To mix the lye, all you have to do is dissolve the lye beads in cold water. Important: Never pour the water into a bowl with the lye beads, always the other way around.
1. now take your chilled stars out of the fridge and carefully dip them into the lye (don't just drop them, otherwise the lye will splash around the kitchen).
2. take your cookies out of the lye again, put them back on the baking tray and sprinkle them with a little pretzel salt.
3. cut the stars in the middle of the prongs using scissors. This is particularly important as otherwise the stars will burst open uncontrollably during baking and no longer look nice.
Place the finished rolls in the preheated oven for 2 minutes. After the 2 minutes, you need to add some steam to the oven. The best way to do this is with a spray bottle. Then bake the stars for a further 8 minutes until they have the typical, perfect color and are nicely baked.
Cut your pretzel stars in half and fill them with your favorite fillings, such as egg salad, salmon mousse, ham, cheese or just a little butter.
Bon appétit!
In our specially equipped bakery, a professional baker will show you what it takes to make the perfect plait, baguette or sourdough. With a great deal of specialist knowledge and professional experience, our course instructor will help you to make various delicious baked goods and understand the processes behind them. For example, you will be introduced to the production of sourdough, which produces particularly aromatic and long-lasting breads. Our courses also include plait braiding and the shaping of plaited animals and filled brioches. There is a baguette course for fans of French bakery, while our special bread course is ideal for those who prefer to experiment with different types of flour. In the Bakehouse from miniSchoggi there is something for everyone.


What should no amateur bakery be without? The pastry cloth! Use the dough cloth to cover your rising dough. All you need is a little flour and you can place your bread dough on it or cover it and leave it to rise. The cloth won't stick to the dough and your kitchen will stay clean. Don't hesitate and start baking your own bread.