...
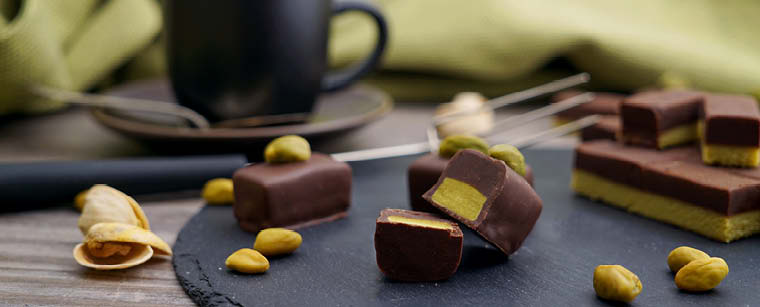
No confectionery shop should be without cut pralines. They are part of the basic training of every confectioner and you will find them in almost every confectionery. The choice of ingredients for these pralines can of course vary greatly, but a firm ganache is always an ingredient in these delicious pralines. You can also make these pralines with several layers, the important thing is simply to have a good cutting harp at home. We used fine pistachio marzipan and dark couverture for our recipe. What came out of it? A melt-in-the-mouth dream of chocolate, almonds and pistachio.

25 min.

2-3 h
180 g whole cream
380 g couverture, dark
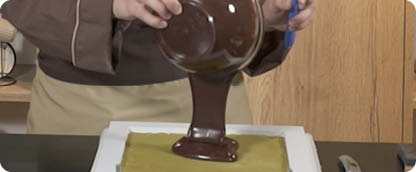
Weigh the couverture and put it in a large bowl.
Boil the whole cream and then pour it over the couverture. Make sure it is well covered with the hot cream and leave the bowl to stand for 1-2 minutes.
After the short standing time, it is much easier to whisk the mixture. Stir until all the couverturedrops have dissolved and you have a nice, smooth ganache.
Cover the ganache directly on the surface and leave it to cool at room temperature for 2-3 hours.
380 g pistachio marzipan
Some icing sugar
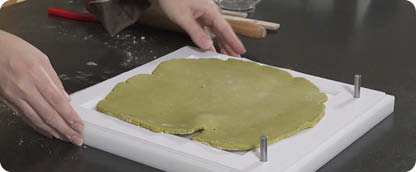
While the ganache is cooling, you can roll out the pistachio marzipan.
Put some icing sugar on your work surface and roll out the marzipan to about 5 mm thick.
Cover the base of your praline frame with baking paper, place the frame on top and place the rolled out marzipan inside.
You can simply cut off any overhanging pieces of marzipan and press them into any gaps.
Once you have spread the marzipan evenly and without gaps in the frame and the ganache has cooled sufficiently, you can move on to the next step.
To do this, stir the cool ganache with a whisk until it is nice and smooth and you can feel it starting to set and become firmer.
Place a frame over the frame with the marzipan base and spread the ganache evenly over it.
Spread the mixture into the corners of the frame and make sure the surface is nice and even. It is best to use an angled spatula for this.
Finally, place a sheet of baking paper over the ganache and roll over it with a large rolling pin to make the surface really even.
Now place the layer of marzipan and ganache in the fridge for at least 30 minutes.
Couverture, dark & tempered
Cutting harp
Trempier fork, 3-pronged
Pistachios, shelled
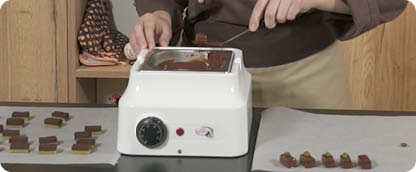
Take the finished cut mixture out of the fridge.
Carefully remove the baking paper from the ganache layer and place a fresh one on top.
Slide a cake plate under the marzipan layer and place another one on top of the ganache lined with baking paper and turn everything 180 degrees.
Remove the bottom cake sheet as well as the baking paper and now put some tempered couverture on your marzipan base. You really only need to use a small amount of chocolate, as this layer only makes it easier to stamp later.
Now spread the couverture evenly over the marzipan mixture using an angled spatula and allow it to set.
As soon as the couverture is firm, you can turn everything back again using the cake tins.
Slide the finished cutting mixture from the cake tray onto your cutting harp.
Turn and push the praline mixture until you get as little waste as possible when cutting and only then press the cutting frame down completely to cut the pralines.
After the first cut, remove the chocolates from the harp using the enclosed cutting harp tray, clean the harp with kitchen paper and insert a narrower cutting attachment.
Now turn the tray with the chocolates 90 degrees and place the chocolates back on the harp. The cut mass should hit the very back of the harp and be pushed again so that there is as little waste as possible. Once the chocolates are in the right place, you can carefully push the harp down again, but with a little pressure, to make the final cut.
Use the tray to push the cut chocolates off the harp again, carefully separate them and place them on a piece of baking paper, spacing them out a little at a time.
Now it's time for the stamping.
Dip the praline upside down into your tempering machine and press it completely into the chocolate. In this step, you have to press the praline into the couverture with the tamper fork in the middle of the edge of the long side. This will completely cover the chocolate and turn it 180 degrees. By using this technique, you will have the fork under the bottom of the praline.
Now lift the praline out of the couverture several times in small movements. This will cause the excess chocolate to flow off.
Then move the praline to the edge of the machine and wipe the bottom of the praline again. Then try to push the praline a little further forward onto the fork, alternating between the left and right sides of the praline. This makes it easier to put the praline down.
Now carefully place the praline on a fresh sheet of baking paper.
Now you can try to make a pattern. To do this, carefully place the prongs of the fork on the surface of the praline and pull it upwards 3-4 times very lightly. You will see that the couverture can be pulled along. The last time you lift it up, pull the fork carefully backwards and three small grooves will remain.
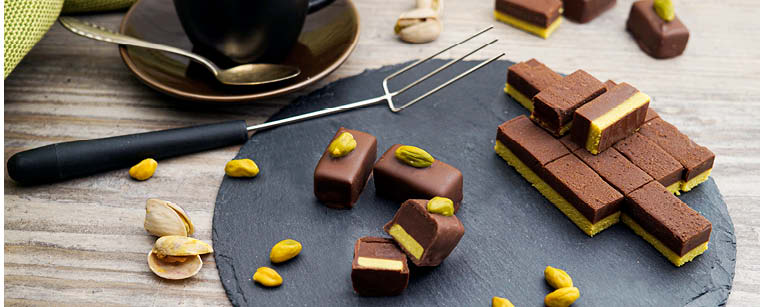
Now place a peeled pistachio on top and your praline is ready!
 Casting your own chocolate Easter bunnies
 Make your own decor roulade
 Cinnamon star recipe
 Correctly temper couverture and chocolate
 Making Halloween chocolates
Leave a comment